How to Make a Colorful Yarn and Pinecone Hedgehog
You’ll never guess what this ball of yarn and a few pinecones become… ????
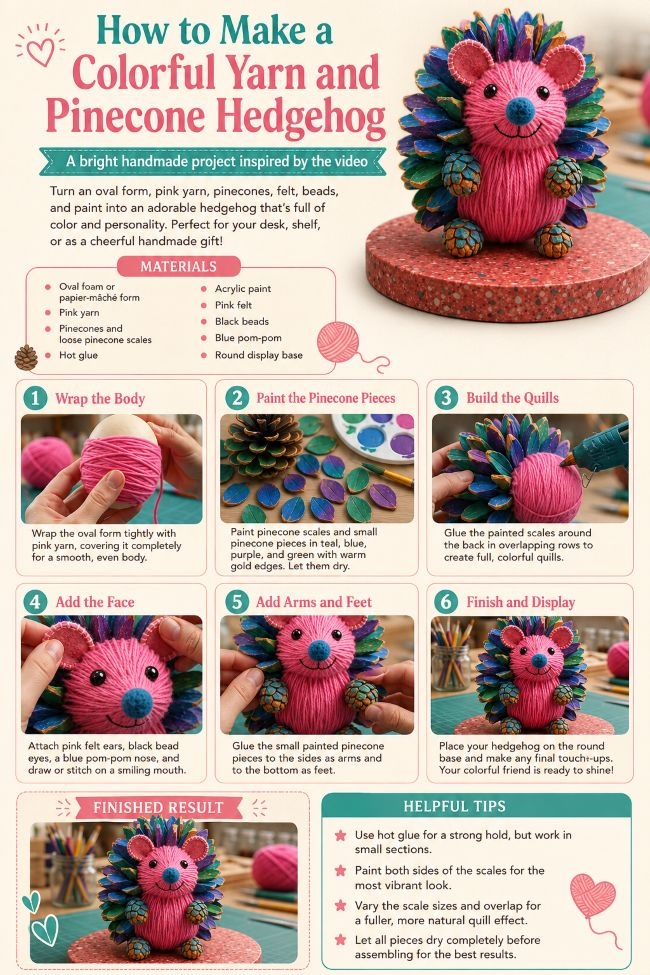
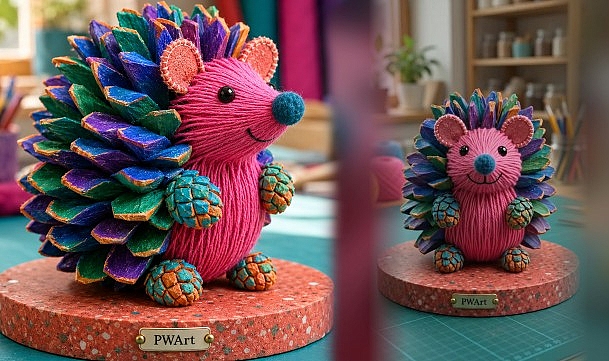
This cheerful handmade hedgehog combines a soft pink yarn body with the natural texture of pinecones. Painted pinecone scales create its dramatic multicolored quills, while stitched felt ears, glossy black eyes, a fuzzy blue nose, and miniature pinecone paws give it a playful personality.
The video shows the transformation quickly. The instructions below explain each stage in detail so you can recreate the same colorful craft at home.
Materials You Will Need
- One oval foam, papier-mâché, or lightweight wooden form
- Bright pink yarn
- Several pinecones
- Loose pinecone scales
- Four small pinecones for the arms and feet
- Hot glue gun and glue sticks
- Acrylic paints in blue, teal, green, purple, and gold
- Small paintbrushes
- Pink felt
- Pink embroidery thread
- Two glossy black beads
- One blue felt ball or pom-pom
- Black embroidery thread or thin black cord
- Scissors
- Craft knife
- Tweezers
- Round display base
- Optional decorative nameplate
Step 1: Wrap the Body with Pink Yarn
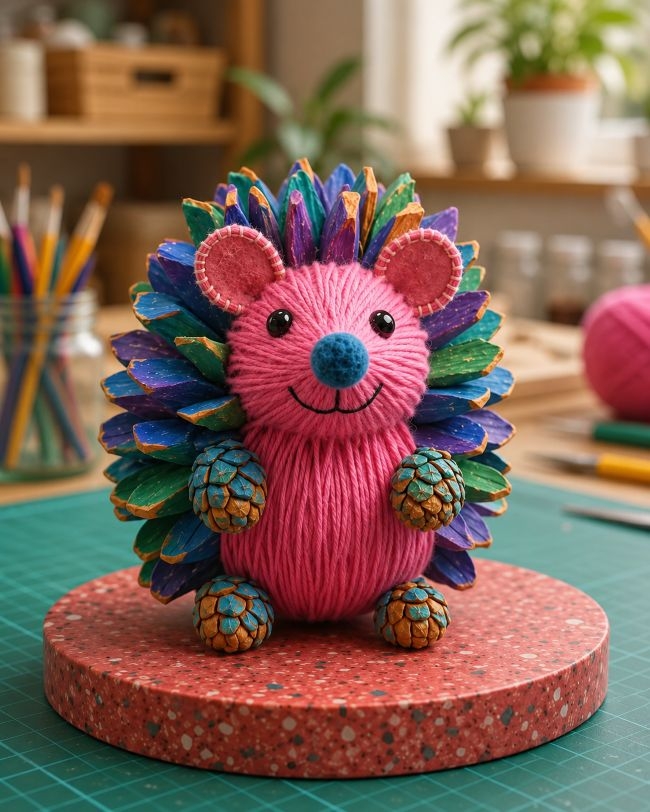
Secure the end of the pink yarn near the lower part of the oval form with a small amount of hot glue.
Wrap the yarn tightly around the form, keeping the strands close together. Turn the form continuously as you work so the yarn covers it evenly.
Add small dots of glue at intervals to prevent the yarn from moving. Continue until the original surface is completely concealed.
Trim the yarn and secure the loose end at the back.
Step 2: Prepare the Pinecone Pieces
Carefully separate several broad scales from the pinecones. These pieces will form the hedgehog’s colorful quills.
Select a mixture of large and small scales. Larger pieces can be placed around the outer back, while smaller pieces are useful for filling gaps.
Paint the scales in several colors:
- Deep blue
- Turquoise
- Emerald green
- Violet
- Purple
Finish the tips and outer edges with warm gold paint. Let every piece dry completely before assembly.
Step 3: Build the Colorful Quills
Begin attaching the painted pinecone pieces around the upper back of the yarn-covered body.
Position each scale with its pointed end facing outward. Add more pieces in overlapping rows, working from the upper center toward the sides and lower back.
Distribute the colors irregularly so the blue, green, teal, and purple pieces appear mixed throughout the design.
Keep the front of the body uncovered for the face.
Step 4: Create the Ears
Cut two matching round ear shapes from pink felt.
Use pink embroidery thread to create a visible stitched border around each piece. This gives the ears the same handcrafted appearance seen in the video.
Curve the ears slightly and glue them near the upper sides of the head, directly in front of the pinecone quills.
Check that they are positioned evenly before the glue sets.
Step 5: Add the Face
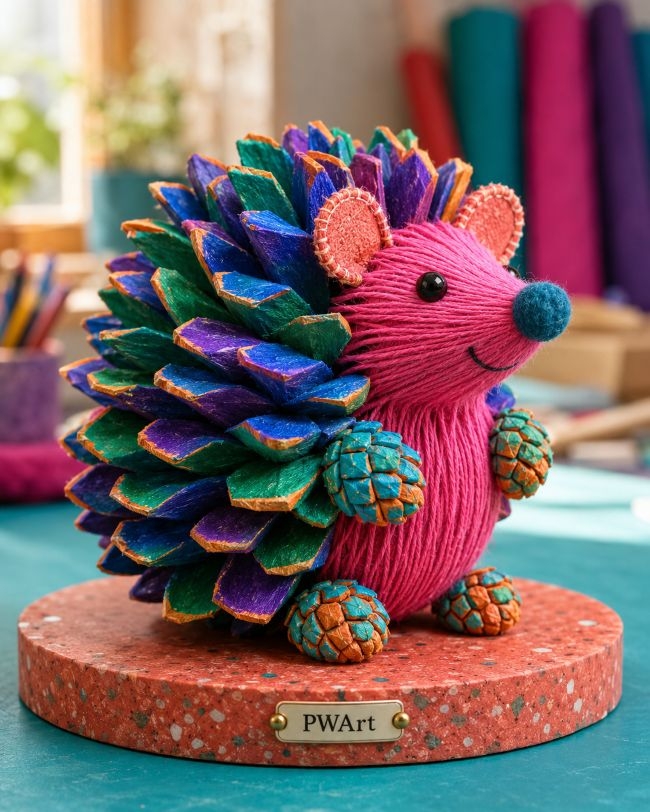
Glue two glossy black beads onto the front of the body to create the eyes.
Attach the blue felt ball or pom-pom beneath the eyes for the nose.
Use black embroidery thread, thin cord, or dimensional paint to make the smiling mouth. Create two gentle curves extending from the center beneath the nose.
Keep the facial elements simple and symmetrical so they remain clear against the textured yarn.
Step 6: Make the Arms
Choose two small pinecones of approximately the same size.
Paint selected scales in turquoise or teal while leaving some of the natural brown surface visible. Add small gold highlights to coordinate them with the quills.
Glue one pinecone to each side of the body. Angle them slightly inward so they resemble small paws.
Step 7: Add the Feet
Prepare two additional small pinecones using the same turquoise, brown, and gold color combination.
Attach them near the lower front of the body. Position the feet evenly so the hedgehog appears balanced when viewed from the front.
Hold each piece firmly until the glue begins to set.
Step 8: Mount the Hedgehog on the Base
Paint or cover a round display base in a pink speckled finish similar to the one shown in the video.
Place the completed hedgehog in the center. Apply strong glue beneath the body and feet, then press the figure securely onto the base.
Allow the adhesive to dry fully before moving the project.
Step 9: Add the Final Details
Inspect the hedgehog from every angle.
Fill visible spaces in the quills with smaller painted pinecone scales. Remove glue strings with tweezers and touch up any damaged paint.
Straighten the ears, eyes, arms, and feet when necessary. A small decorative nameplate can also be attached to the front of the base.
Helpful Crafting Tips
- Paint the pinecone pieces before attaching them.
- Test the color arrangement before applying glue.
- Use small amounts of hot glue to prevent visible buildup.
- Keep the central face area clear of large pinecone scales.
- Select matching pinecones for balanced arms and feet.
- Let all painted components dry completely before assembly.
The finished hedgehog features a bright pink yarn body surrounded by blue, teal, green, and purple pinecone quills with gold-edged details.
Its stitched pink ears, glossy eyes, blue nose, smiling mouth, and miniature pinecone paws make it a cheerful decoration for craft rooms, nursery shelves, handmade gift displays, and colorful seasonal collections.